Today’s DIY Kids project aims to produce a personalised gift for someone you and your children love, such as a grandparent or an aunt. There are three gifts in this tutorial arranged in order of skill: easy, harder, and challenging!
As the main ingredient, we’re using an item easily found at a charity shop or in the sale rack at a discount store: 2 quilted placemats. By re-purposing these placemats, you can make either a) personalised placemats, b) pot holders, or c) a tote to carry a gift bottle of wine, juice, or olive oil to a party.
What You’ll Need
- 2 quilted placemats
- fabric paint
- a paper plate or a vegetable tray for the paint
- sewing machine and/or needle & thread
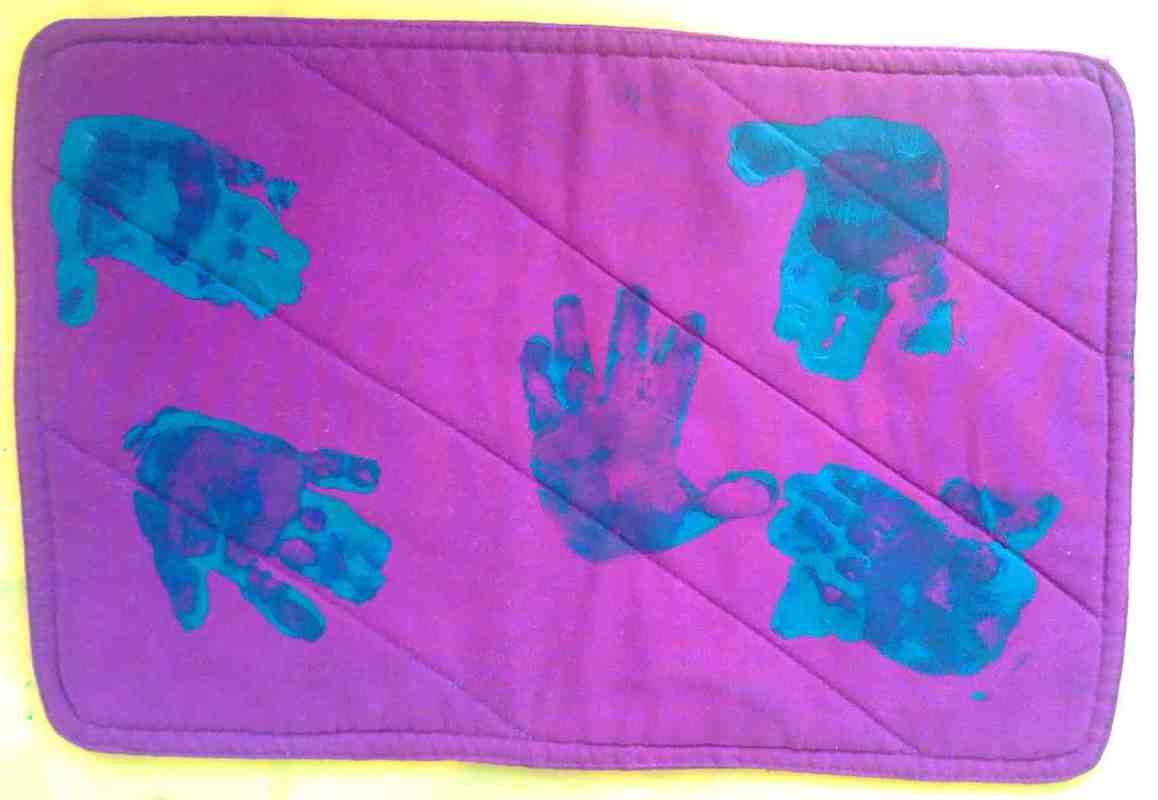
Step 1: Placemats
Place a large dollop of paint on a paper plate or polystyrene veggie tray. Encourage your child to dip his hand in the paint and make a handprint on the placemats. Depending on the child’s age, you could make a pattern or just print them randomly, as we did here:

The result is gift option one: hand-printed placemats!
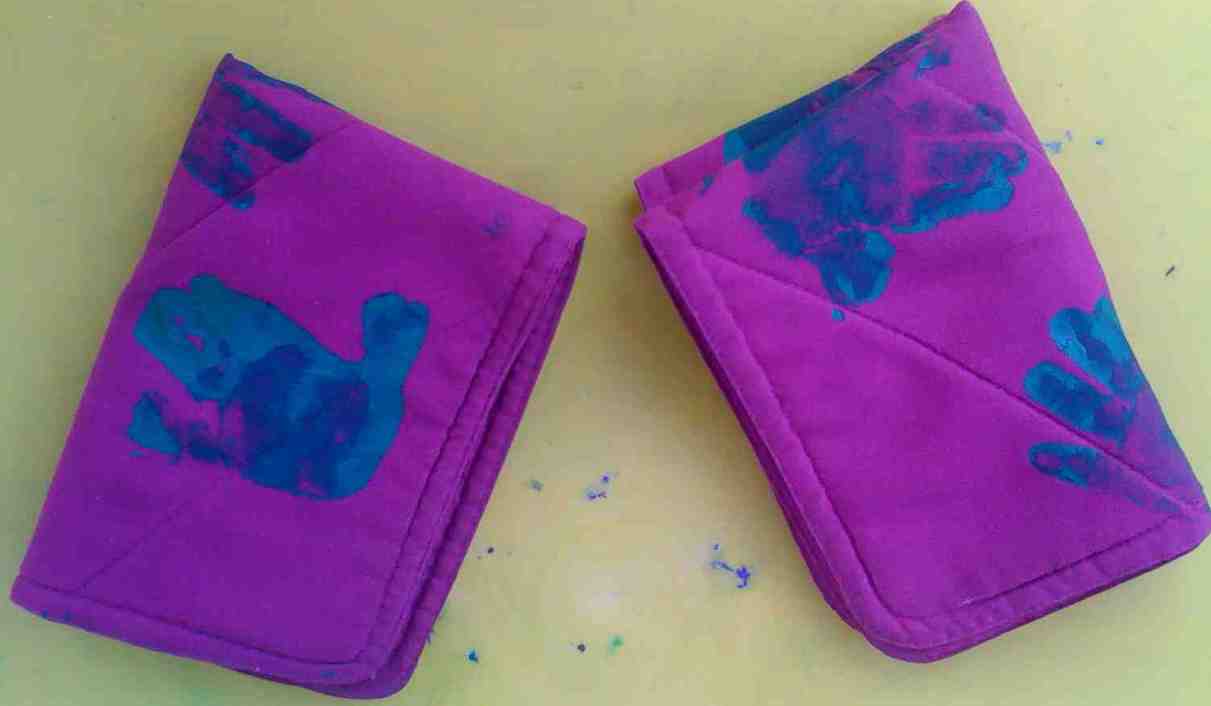
Step 2: Pot holder
A quilted placemat folded in half twice makes a great hot pot holder. You could sew the edges together if you wish, but it’s more of a re-naming or re-purposing.
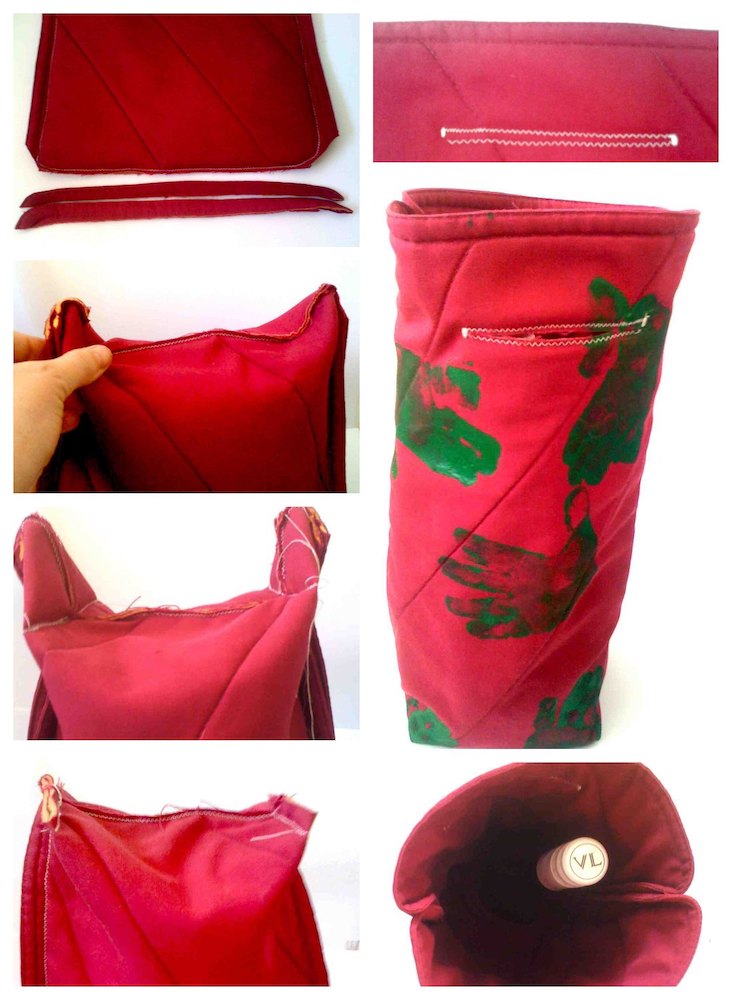
Step 3: Create a tote, first in a simple way …
A tote is a bag, with or without a handle. Start by putting the mats together, printed sides facing in. Sew all the way around three sides, leaving one short side open. Turn it inside out, and you have a standing bag.
Step 4: A more complicated tote
To make an even more professional-looking tote, you could choose to “box the corners” at the bottom of the bag and also cut a large handle into each side of the top of the bag.
Boxing the corners means making little bunny ears, sewing across them, and then cutting them off. It makes the bottom of the bag flat.
To create a handle, sew a huge buttonhole with your machine: zigzag down the long ends, and do a sturdy stitch about 10 times at each tiny end. Use a sharp scissors to cut a slit through, where your hand can then go.
If you have any questions about making these projects, please leave a comment below and I’ll do my best to clarify the tutorial. Have fun!
Click here to find places in Gauteng offering arts and craft classes.
Note: If you enjoyed this article, and would like to stay updated with more, you can:
- Subscribe to our free weekly Jozikids newsletter for parents in Gauteng
- Like us on Facebook
- Follow us on Instagram